
by admin | Feb 12, 2024 | Blog
10 Strategies for Crafting the Ultimate Best Sports Website Design

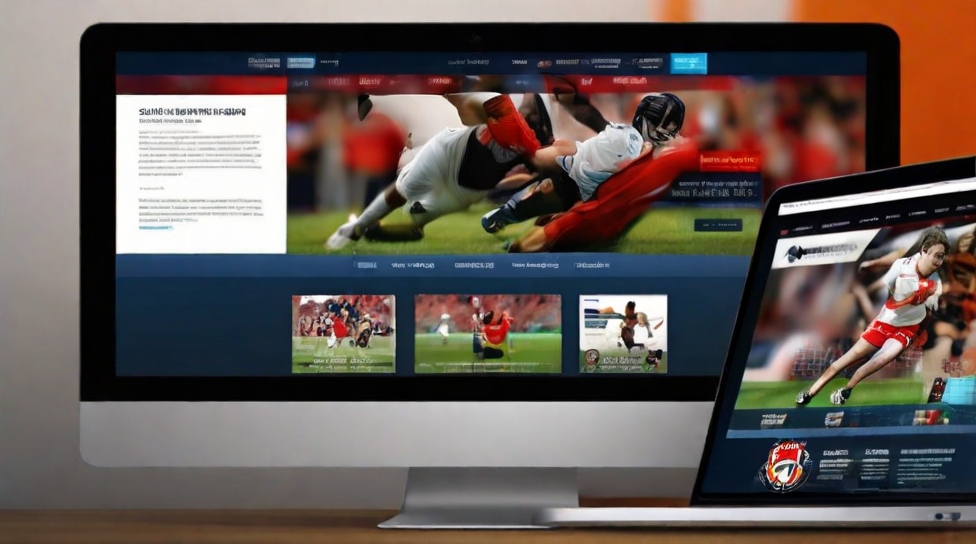
A vibrant, action-packed sports website featuring thumbnails of soccer, basketball, tennis, and running activities. Shiny trophies symbolize triumph and success. Color-coded symbols represent different sections of the website: a soccer ball for football news, a stopwatch for latest results, and a microphone for podcasts and interviews. The background has a sleek design with abstract shapes, rich colors, and smooth transitions.
Introduction
The design of a sports website plays a crucial role in attracting and engaging users. A well-designed website not only enhances the user experience but also elevates the online presence of your brand. In this article, we will discuss 10 dynamite strategies that will help you craft the ultimate best sports website design.
When it comes to sports websites, good design goes beyond aesthetics. It is about creating a seamless user experience that keeps visitors coming back for more. Whether you are designing a website for a sports team, a sports news outlet, or a sports merchandise store, these strategies will help you create a website that stands out from the competition.
1. Defining Goals and Understanding Your Target Audience
When starting the design process for your sports website, it’s important to begin by defining your goals and understanding who your target audience is. This will help you create a website that not only looks great but also meets the needs of your users.
1.1 Identifying the Purpose of Your Sports Website
The first step in this process is to identify the purpose of your sports website. What do you hope to achieve with it? Are you looking to:
- Provide information about your sports team or organization?
- Sell sports merchandise or tickets?
- Share news and updates about the latest sporting events?
By setting specific and measurable goals that align with your overall brand strategy, you’ll have a clear direction for your website design.
1.2 Researching Your Target Audience
Once you’ve defined your goals, the next step is to research your target audience. Who are the people that you want to attract to your website? What are their preferences and behaviors when it comes to sports?
To gain valuable insights into your target audience, you can utilize market research techniques such as:
- Conducting surveys or interviews
- Analyzing data from website analytics tools
- Studying competitor websites and social media channels
By understanding the needs and motivations of your target audience, you’ll be able to tailor your website design to better meet their expectations.
2. Gaining Inspiration from Successful Sports Websites
The process of crafting the ultimate best sports website design begins with gaining inspiration from successful sports websites. This step is crucial in maintaining a unique and innovative approach while drawing insights from industry leaders and competitors.
The importance of gathering inspiration while maintaining uniqueness in your design approach for a sports website.
It’s important to gather inspiration from successful sports websites because it allows you to see what works well in terms of design, functionality, and user experience. However, it’s equally important to maintain uniqueness in your own design approach to stand out from the competition.
Examining case studies of popular sports websites that have achieved success in terms of both aesthetics and functionality.
Looking at case studies of popular sports websites can provide valuable insights into what makes them successful in terms of both their visual appeal and how well they function. By analyzing these case studies, you can identify specific elements or strategies that you could incorporate into your own design.
2.1 Conducting In-Depth Research on Successful Sports Websites
Strategies for conducting thorough research on existing sports websites in your niche.
When conducting research on existing sports websites in your niche, consider the following strategies:
- Explore different types of sports websites: Look at a variety of sports websites, including those focused on news, team information, ticket sales, or fan communities.
- Analyze user reviews and feedback: Pay attention to what users like and dislike about these websites to understand their pain points and preferences.
- Take note of design elements: Observe the color schemes, typography choices, layout structures, and overall visual aesthetics used by these websites.
- Evaluate navigation and usability: Test how easy it is to navigate through these websites and find specific information or features.
- Consider mobile responsiveness: Check if these websites are optimized for mobile devices, as mobile usage is increasingly common among sports fans.
2.2 Learning From Industry Leaders and Competitors
To learn from industry leaders and competitors, follow these techniques:
- Identify key competitors: Make a list of the top sports websites in your niche that you consider as your main competitors.
- Evaluate their design choices: Analyze the visual elements, layout structures, and overall user interface of their websites.
- Assess their content strategy: Look at how they present their content, such as articles, videos, or images, to engage with their audience effectively.
- Pay attention to interactive features: Take note of any interactive features or functionalities they offer, such as live scores, social media integrations, or fantasy sports games.
- Find areas for improvement: Identify any weaknesses or areas where you believe you can offer a better experience than your competitors.
By conducting in-depth research on successful sports websites, you can gain valuable insights into design trends, user experience strategies, and content presentation techniques. Analyzing industry leaders and competitors allows you to identify best practices and areas for improvement, guiding you in creating a sports website design that stands out while meeting the needs of your target audience.
3. Creating a Solid Wireframe for Your Sports Website
Wireframing plays a crucial role in creating a well-structured layout and user flow for your sports website design. It’s essential to understand the key elements of an effective wireframe and how to translate it into a compelling visual design that aligns with your brand identity.
3.1 Understanding the Key Elements of an Effective Wireframe
When creating a wireframe for your sports website, include these basic components that form the foundation of the site’s layout and structure:
- Header
- Footer
- Main content sections
These elements provide an outline of the website’s interface, helping you visualize where essential features and content should be placed.
3.2 Translating Your Wireframe Into a Compelling Visual Design
Once you have a solid wireframe for your sports website, it’s time to turn it into a visually appealing design that reflects your brand. Here are some tips for transforming your wireframe into a polished visual representation:
- Integrate aesthetic elements like imagery, color schemes, and typography.
- Ensure cohesiveness with your brand’s image and message.
- Focus on user experience and seamless navigation while adding aesthetics.
By following these tips, you can create a captivating design that resonates with your audience and effectively communicates your brand’s message.
4. Optimizing Information Architecture and Content Organization
To create the ultimate best sports website design, it is crucial to optimize the information architecture and content organization. This will ensure a seamless user experience and make it easier for your audience to navigate through your website.
Carefully organizing the information on your sports website is essential for guiding users through your content. By structuring your website in a logical and intuitive manner, you can help users find what they’re looking for quickly and easily. Consider grouping related content together and creating clear hierarchies that allow users to navigate effortlessly.
Sitemaps for enhanced discoverability
Implementing a sitemap on your sports website can greatly enhance discoverability for both users and search engines. A sitemap is like a roadmap that outlines the structure of your website, making it easier for search engine crawlers to index your pages and for users to find specific content. Including a sitemap in your overall information architecture strategy can greatly improve the visibility of your website.
One of the most important aspects of information architecture is designing clear and concise navigation menus that reflect the main sections of your website. Navigation menus act as signposts that guide users through your site, so it’s essential to make them intuitive and user-friendly. Utilize best practices such as using descriptive labels, keeping menu items organized, and considering dropdown menus for subcategories.
By optimizing the information architecture and content organization on your sports website, you can create a user-friendly experience that encourages visitors to explore more of what you have to offer. Remember to consider the needs and preferences of your target audience when designing these elements.
5. Striking the Right Balance Between Visual Appeal and Usability
When it comes to sports websites, finding the right balance between looking good and being easy to use is important. Designing a sports website comes with its own challenges and opportunities because you want it to be both visually impressive and easy for people to navigate. Here are some things to think about:
Layout design
The way your sports website is laid out is key to making it look good and work well. Here are a few things to keep in mind when designing your layout:
- Clear hierarchy: Organize your content in a way that makes sense, with important stuff standing out.
- Whitespace: Give your content some breathing room by using whitespace effectively.
- Responsive design: Make sure your sports website looks good on all devices, from big desktop screens to small mobile phones.
Choosing an Appropriate Color Scheme
Colors can make a big difference in how your sports website feels. Here are some tips for picking the right colors:
- Reflect team branding: Use colors that match the team or organization you’re representing.
- Consider contrast: Make sure people can read your text by having enough contrast between the words and the background.
- Highlight key elements: Use different colors to draw attention to important buttons or links.
Typography Combination
The fonts you choose can affect how easy it is for people to read your sports website. Here are a few things to consider when picking fonts:
- Legibility: Use fonts that are clear and easy to read, no matter what device someone is using.
- Hierarchy: Make it clear what’s important by using different sizes, weights, and styles of fonts.
- Consistency: Stick with the same fonts throughout your website to make it look professional.
Remember, the goal is to make a sports website that looks great and is easy for people to use. By finding the right balance between visual appeal and usability, you can keep your audience interested and coming back for more.
6. Designing Intuitive Navigation for Seamless User Experience
Navigation design and a user-friendly interface are essential components of a successful sports website. When it comes to designing intuitive navigation, there are key principles that can guide you in creating elements that effectively lead users to relevant content on your website.
One crucial aspect of intuitive navigation is the implementation of clear call-to-action (CTA) buttons in strategic areas of your sports website. These buttons serve as prompts for users to take specific actions, such as signing up for newsletters, purchasing tickets, or accessing exclusive content. By strategically placing persuasive CTA buttons throughout your website, you can drive user engagement and conversions.
Consider Color Contrast, Placement, and Compelling Copy
When designing these CTA buttons, it’s important to consider factors such as color contrast, placement, and compelling copy:
- Color Contrast: Utilizing contrasting colors that stand out against the background can draw attention to the buttons, making them more noticeable to users.
- Placement: Additionally, placing CTAs in prominent locations, such as within hero sections or at the end of compelling content pieces, can increase their visibility and impact.
- Compelling Copy: Crafting compelling copy for your CTA buttons is equally important. Using action-oriented language that clearly communicates the benefit or outcome of clicking the button can motivate users to take the desired action.
Example: Generic vs Specific Value Proposition
For example, instead of a generic “Learn More” button, you might use “Unlock Exclusive Content” to entice users with a specific value proposition.
Generic Button: Learn More
Specific Value Proposition Button: Unlock Exclusive Content
By strategically incorporating clear call-to-action buttons into your sports website’s design, you can enhance user navigation while driving meaningful interactions and conversions.
Incorporating intuitive navigation elements and strategically placed CTA buttons will contribute to a seamless user experience on your sports website, ultimately leading to increased user engagement and conversions.
7. Mobile Responsiveness: A Must-Have for Any Sports Website
The rise of mobile devices as the primary platform for accessing online content has transformed the digital landscape, making mobile responsiveness a non-negotiable aspect of sports website design.
With users accessing sports updates, match schedules, and news predominantly on their smartphones and tablets, it’s imperative to ensure that your website provides an optimal viewing experience across a variety of screen sizes and devices. This necessitates the implementation of a robust mobile-friendly approach that caters to the diverse needs of your audience.
Ensuring cross-device compatibility involves rigorous testing and optimization to guarantee a seamless user experience regardless of the device being used. Here are some strategies for achieving this:
- Responsive Design: Implementing responsive web design techniques allows your sports website to adapt fluidly to different screen sizes, maintaining visual appeal and functionality throughout.
- Mobile-Friendly Testing Tools: Leveraging tools such as Google’s Mobile-Friendly Test can help identify issues and optimize your website for mobile usability, ensuring that it meets industry standards.
- User Experience (UX) Testing: Conducting thorough UX testing across various devices enables you to identify potential navigation or layout issues specific to certain screen sizes and rectify them promptly.
- Performance Optimization: Prioritizing performance optimization for mobile devices by minimizing loading times, optimizing images, and prioritizing content delivery ensures a swift and responsive user experience.
By prioritizing mobile responsiveness and cross-device compatibility in your sports website design, you can effectively engage with a wider audience while reinforcing your online presence in an increasingly mobile-centric digital landscape.
8. Iterative Design Refinement through User Testing and Feedback
The design process for a sports website is an iterative one, meaning that it involves continuous refinement based on user feedback. Gathering feedback from actual users of your sports website is essential to ensure that your design choices are effective and align with the needs and expectations of your target audience. Here are some key points to consider:
Conducting Usability Tests to Evaluate the Effectiveness of Your Sports Website Design Choices
Usability testing allows you to observe how users interact with your website and identify any usability issues or areas for improvement. There are several methods you can use to conduct usability tests, including remote testing or in-person sessions with participants. By watching users navigate through your website, you can gain valuable insights into their behavior, frustrations, and preferences.
Implementing User Feedback
Once you have gathered feedback from usability tests or other sources, it’s important to analyze and incorporate this feedback into your design. This may involve making changes to the layout, navigation, content organization, or visual elements of your sports website. By addressing the concerns and suggestions raised by users, you can create a more user-friendly and engaging experience.
It’s worth noting that user feedback should be seen as an opportunity for improvement rather than criticism. Embracing user feedback shows that you value your audience and are committed to providing them with the best possible experience on your sports website.
By continuously iterating and refining your design based on user feedback, you can ensure that your sports website evolves over time to meet the changing needs and expectations of your audience.
“Design is not just what it looks like and feels like. Design is how it works.” – Steve Jobs
9. Exploring Different Website Layouts for Sports Websites
When it comes to designing a sports website, the layout plays a crucial role in capturing the attention of visitors and conveying information effectively. Here, we will explore some popular website layouts that can be effectively utilized in sports website designs, along with examples for each.
Zig-zag Layout: Showcasing Dynamic Grid-Based Approach
The zig-zag layout is a versatile option that can add a dynamic visual appeal to your sports website. It involves arranging content in a grid-like pattern that alternates between different sizes and shapes. This layout creates a sense of energy and movement, mimicking the excitement of sports.
One example of a sports website utilizing the zig-zag layout is ESPN. Their homepage features a visually engaging grid of articles and videos, with different-sized tiles arranged in an alternating pattern. This layout allows for easy scanning of content and draws the user’s attention to key headlines or featured stories.
Card-based Layout: Organizing Content in Bite-sized Chunks
The card-based layout is a popular choice for sports websites due to its ability to organize content into easily digestible chunks. Each piece of information is presented as an individual card, making it visually appealing and scannable.
An excellent example of a sports website using the card-based layout is Bleacher Report. They present their articles as cards, with each card featuring a title, image, and brief description. Users can quickly browse through the cards, click on the ones that interest them, and access more detailed content.
Asymmetrical Layout: Embracing Creativity and Uniqueness
For sports websites that want to stand out from the crowd, an asymmetrical layout can be an excellent choice. This layout breaks away from traditional grid structures and allows for more creative freedom in arranging elements on the page.
One inspiring example of an asymmetrical layout is Nike’s official website. They use overlapping images and text, unique angles, and varying sizes to create a visually stunning and dynamic design. This layout reflects Nike’s brand identity as an innovative and boundary-pushing sports company.
By exploring different website layouts like the zig-zag, card-based, and asymmetrical layouts, you can find inspiration to create a unique and visually appealing design for your sports website. Remember to consider your target audience and the goals of your website when choosing a layout that best aligns with your brand.
10. Showcasing Dynamic Content with Parallax Scrolling: A Case Study on Sports Website Design
Parallax Layout and Its Impact
Parallax scrolling can create a visually engaging and interactive storytelling experience on sports websites. It adds depth and dimension to the content, immersing users in the narrative of the sports brand.
Case Study: Implementation in Sports Website Design
Case Study Example:
The official website of a top-tier sports event utilized parallax scrolling to showcase the journey of athletes, from their training sessions to triumphant moments on the field. As users scrolled through the website, the parallax effect accentuated the dynamic visuals, enhancing the emotional connection with the audience.
Empower Your Sports Brand with a Winning Website Design
Investing in a professional website design is crucial for long-term success in the competitive sports industry. By incorporating dynamic elements like parallax scrolling, you can elevate your sports brand’s online presence and captivate your audience with compelling storytelling.
FAQs(Frequently Asked Questions)
What is the first step in the design process for a sports website?
The first step in the design process for a sports website is to identify the purpose of the website. This involves understanding the goals and defining the target audience.
How can I gather inspiration for crafting the ultimate best sports website design?
You can gain inspiration from successful sports websites by examining case studies of popular sports websites that have achieved success in terms of both aesthetics and functionality. It’s important to gather inspiration while maintaining uniqueness in your design approach.
What are some strategies for conducting thorough research on existing sports websites in my niche?
When conducting research on existing sports websites in your niche, you can gain inspiration by learning from industry leaders and competitors. This involves analyzing the strengths and weaknesses of your competitors’ websites to inform your own design decisions.
Why is wireframing crucial in creating a well-structured sports website?
Wireframing plays a crucial role in creating a well-structured sports website by helping to understand the key elements of an effective wireframe and translating it into a compelling visual design.
How can I strike the right balance between visual appeal and usability for my sports website?
To strike the right balance between visual appeal and usability, you should focus on layout design, choosing an appropriate color scheme, and typography combination. It’s important to consider how these elements affect user experience.
Why is mobile responsiveness important for a sports website?
The rise of mobile devices as the primary platform for accessing websites makes mobile responsiveness a must-have for any sports website. It’s crucial to test and optimize your sports website’s performance on different screen sizes to ensure cross-device compatibility.
What is involved in iterative design refinement through user testing and feedback?
Iterative design refinement through user testing and feedback involves conducting usability tests to evaluate the effectiveness of your sports website design choices, as well as implementing user feedback to make necessary improvements.
What are some different website layouts suitable for sports websites?
When designing a sports website, you can explore different layouts such as zig-zag layout, card-based layout, and asymmetrical layout. Each layout offers unique ways of organizing content and showcasing creativity.
Parallax scrolling can create a visually engaging and interactive experience on a sports website. By showcasing dynamic content with parallax scrolling, you can empower your sports brand with a winning website design.
by admin | Feb 4, 2024 | Blog
Table of Contents
- Introduction
- Importance of Sports Website Design
- Examples of Great Sports Website Designs
- Essential Features for Sports Websites
- Sports Website Design Ideas and Inspirations
- Different Sports Website Templates
- Pros and Cons of Sports Website Design
- Frequently Asked Questions (FAQs)
- Conclusion
Sports website design plays a crucial role in attracting and engaging sports enthusiasts online. Whether you’re building a website for a sports team, league, or organization, it’s essential to create an appealing and user-friendly platform that captures the spirit of the sport. In this blog, we’ll explore the best practices, ideas, templates, and inspirations for sports website design.
Importance of Sports Website Design
When it comes to sports websites, first impressions matter. A well-designed and visually appealing site can instantly grab the attention of visitors and make them want to explore further. Here are some reasons why investing in a high-quality sports website design is important:
- Credibility: A professional-looking website enhances the credibility of your sports team or organization.
- User Experience: An intuitive and easy-to-navigate website keeps users engaged and encourages them to spend more time exploring your content.
- Branding: A well-designed website reflects the personality and branding of your sports team, helping to build a strong identity.
- Promotion: A visually compelling design makes it easier to promote your sports team, events, and merchandise online.
- Communication: An effective website design ensures seamless communication with your audience, keeping them informed about the latest news and updates.
Examples of Great Sports Website Designs
To better understand what makes a sports website design stand out, let’s take a look at some impressive examples:
| Website |
Description |
| NBA.com |
The official website of the National Basketball Association (NBA) features a dynamic design that showcases player highlights, schedules, and scores. |
| MLB.com |
Major League Baseball’s official website offers an organized layout with easy access to team news, player stats, and game information. |
| Nike Football |
Nike’s football website showcases their latest products, encourages user engagement, and provides exclusive content such as interviews and training tips. |
| UEFA.com |
The Union of European Football Associations (UEFA) has a visually striking website that covers European football matches, competitions, and news. |
These examples demonstrate different approaches to sports website design, from the use of vibrant visuals to the incorporation of interactive elements.
Essential Features for Sports Websites
When designing a sports website, certain features are essential to ensure a seamless user experience. Here are some key elements to consider:
- Live Scoreboards: Keep fans updated on the latest scores and results.
- Player Profiles: Provide in-depth information about athletes and their achievements.
- Event Calendar: Display upcoming games, matches, or tournaments.
- News and Articles: Deliver engaging content to keep fans informed and entertained.
- Ticket Sales: Offer a convenient platform for purchasing tickets to games or events.
- Social Media Integration: Connect your website to social media platforms to encourage sharing and increase engagement.
- Multimedia Content: Include videos, photo galleries, and interviews to enhance the user experience.
- Mobile Responsiveness: Ensure your website is optimized for mobile devices, as many fans access sports content on smartphones and tablets.
- Fan Engagement: Incorporate features such as polls, forums, and interactive games to foster a sense of community.
- Sponsorship Display: Create dedicated sections to showcase sponsors and partners, helping generate revenue.
Sports Website Design Ideas and Inspirations
Looking for inspiration for your sports website design? Here are some ideas to help you get started:
- Minimalist Approach: Opt for a clean and simple design that emphasizes the content and visuals.
- Bold Color Schemes: Choose colors that complement your team’s branding and create visual impact.
- Hero Images and Videos: Feature high-quality images or videos that capture the essence of your sport.
- Custom Illustrations: Consider incorporating custom illustrations that convey the energy and passion of your team or sport.
- Interactive Elements: Engage users with quizzes, polls, or fantasy sports leagues.
- Scrolling Effects: Utilize parallax scrolling or other dynamic effects to add depth and interactivity to your website.
- User-Generated Content: Showcase fan photos, videos, or testimonials to foster a sense of community.
- Player Spotlights: Highlight individual players through interviews, profiles, or statistics.
- Community Outreach: Feature charitable initiatives, collaborations with local organizations, or fan events.
- Storytelling: Use engaging narratives and multimedia elements to tell captivating stories about your team or sport.
By incorporating these ideas into your design, you can create a sports website that captures the attention of fans and keeps them coming back for more.
Different Sports Website Templates
If you’re looking for pre-designed templates to jump-start your sports website, there are several options available. Here are some popular platforms that offer sports-specific templates:
| Platform |
Description |
| WordPress |
WordPress offers various sports-related themes that can be customized to fit your specific needs. |
| Wix |
Wix provides a range of sports-focused templates with drag-and-drop functionality, making it easy to customize your site. |
| Squarespace |
Squarespace offers sleek and modern templates, with specific options tailored for sports teams and athletes. |
Take advantage of these platforms to simplify the website design process and focus on fine-tuning the content rather than starting from scratch.
Pros and Cons of Sports Website Design
As with any design approach, there are pros and cons to sports website design:
| Pros |
Cons |
| Enhanced credibility |
Potential cost of professional design services |
| Improved user experience |
Time and effort required to maintain and update the website regularly |
| Stronger branding |
Need for continuous optimization to keep up with evolving design trends and technologies |
| Greater promotion opportunities |
Dependency on reliable hosting services for consistent website performance |
| Effective communication with fans |
Potential security vulnerabilities that require ongoing monitoring and mitigation |
It’s important to consider these factors when planning and designing your sports website to make informed decisions.
“Designing a sports website is more than just aesthetics – it’s about creating a platform that captures the spirit of the sport, engages fans, and builds credibility. Invest in a high-quality design to score big with sports enthusiasts online.”
Counterargument: While sports website design can play a role in engaging sports enthusiasts, it is not the sole determining factor in attracting and retaining users. The content and functionality of the website are equally important, if not more so.
A visually appealing design may grab attention initially, but if the website lacks relevant and up-to-date content, users may quickly lose interest. It is essential to prioritize the quality and relevance of the information provided on the website, such as game schedules, player profiles, and news updates.
Additionally, investing in a high-quality design can be costly, especially if professional design services are required. For smaller sports teams or organizations with limited budgets, this may not be a feasible option. It is important to consider the cost-benefit ratio and allocate resources accordingly.
Furthermore, while sports website design can enhance credibility and branding, it is not a guarantee of success. User experience and functionality are crucial in ensuring that visitors can easily navigate the website and find the information they are looking for. A visually appealing design alone cannot compensate for a poorly designed user interface.
In conclusion, while sports website design can contribute to attracting and engaging sports enthusiasts, it should not overshadow the importance of content, functionality, and user experience. A well-rounded approach that considers all these factors is necessary for a successful sports website.
Frequently Asked Questions (FAQs)
- Q: How much does it cost to design a sports website?
- A: The cost of designing a sports website can vary depending on factors such as complexity, customization, and whether you hire professionals or use pre-designed templates.
- Q: Can I design a sports website without technical skills?
- A: Yes, with user-friendly website builders like WordPress, Wix, and Squarespace, you can create a sports website without extensive technical knowledge.
- Q: What are some popular website builders used for sports websites?
- A: Popular website builders for sports websites include WordPress, Wix, and Squarespace, as mentioned earlier in this blog.
- Q: Are there any specific design trends for sports websites?
- A: Design trends for sports websites often include dynamic elements, bold colors, and a focus on showcasing engaging content.
- Q: How can I increase fan engagement on my sports website?
- A: Encourage fan engagement by incorporating features such as polls, forums, interactive games, and user-generated content.
Conclusion
Designing an impressive sports website involves considering essential features, gaining inspiration from successful examples, and staying true to your team’s brand. By incorporating engaging design ideas and utilizing appropriate templates, you can create a visually appealing platform that provides fans with an exceptional experience. Remember to regularly update your content, integrate social media, and engage with your audience to foster an active and passionate community of sports enthusiasts. So, why wait? Start designing your winning sports website today!
CALL TO ACTION: Subscribe to our newsletter for more sports website design tips and updates, and don’t forget to share this article with fellow sports enthusiasts. Explore our related articles about effective sports website content and top sports website templates for more inspiration.

by admin | Jan 30, 2024 | Blog
How to Speed Up Image Loading on Your Website
In the fast-paced world of the internet, where attention spans are short and users demand instant gratification, optimizing your website’s image loading speed is crucial. Whether you’re a seasoned web developer or just starting with HTML, ensuring that your images load quickly can significantly enhance the user experience. In this comprehensive guide, we’ll delve into various strategies, including HTML techniques, Chrome optimizations, website speed tests, and JavaScript tweaks, to make your images load faster.
Table of Contents
- Introduction
- Understanding the Importance of Image Loading Speed
- HTML Techniques for Faster Image Loading
- Optimizing Image Loading in Chrome
- Conducting Website Speed Tests
- Enhancing Image Loading Speed with JavaScript
- Engaging Questions to Consider
- Conclusion
- FAQs – Anticipating Your Questions
Introduction
When it comes to website performance, one of the key factors is the speed at which images load. Slow-loading images can drive users away and negatively impact your site’s SEO. In this guide, we’ll explore techniques to speed up image loading on your website, ranging from HTML strategies to Chrome optimizations and JavaScript tweaks.
Understanding the Importance of Image Loading Speed
In today’s digital age, users expect websites to load quickly. Slow-loading images can frustrate users and lead to high bounce rates. Before diving into the technical aspects, let’s understand why image loading speed matters and how it influences user experience.
| Importance of Image Loading Speed |
| Faster loading improves user experience |
| Impact on SEO rankings and search engine visibility |
| Mobile users prioritize fast-loading websites |
| Slow-loading images can increase bounce rates |

HTML Techniques for Faster Image Loading
Optimizing images through HTML is a fundamental step in enhancing loading speed. Let’s explore some HTML techniques that can make a significant difference in how images are loaded on your website.
| HTML Techniques for Image Loading |
| Use the “height” and “width” attributes |
| Employ responsive image techniques |
| Leverage lazy loading for deferred image loading |
| Optimize image file formats for the web |
Minimize the use of unnecessary ![]() tags tags |
Optimizing Image Loading in Chrome
Chrome is one of the most widely used browsers, and optimizing your website for it can have a substantial impact on user experience. Here are some Chrome-specific optimizations to speed up image loading.
| Chrome Optimizations for Image Loading |
| Leverage Chrome’s DevTools for performance analysis |
| Use responsive images with “srcset” for varying screen sizes |
| Enable lazy loading for improved loading times |
| Leverage browser caching for frequently used images |
| Optimize images using Chrome’s built-in tools |
Conducting Website Speed Tests
Before implementing changes, it’s essential to assess your website’s current speed. We’ll explore various tools and techniques to conduct thorough website speed tests.
| Website Speed Test Strategies |
| Use tools like Page Speed Insights and GTmetrix |
| Analyze and optimize server response times |
| Compress and minify images for faster loading |
| Evaluate the impact of third-party scripts and plugins |
| Monitor website speed across different devices and browsers |
Enhancing Image Loading Speed with JavaScript
JavaScript can be a powerful ally in optimizing image loading speed. Let’s explore how you can leverage JavaScript to make your images load faster without compromising functionality.
| JavaScript Tweaks for Faster Image Loading |
| Implement asynchronous loading for non-blocking rendering |
| Use image preloading to load images in the background |
| Optimize JavaScript code for efficient execution |
| Utilize a content delivery network (CDN) for image distribution |
| Implement lazy loading for JavaScript-powered image galleries |
Engaging Questions to Consider
As you embark on the journey of optimizing your website’s image loading speed, consider these engaging questions:
- How do image loading times impact user engagement on your website?
- What HTML attributes play a crucial role in optimizing image loading speed?
- Have you utilized Chrome’s Dev Tools to analyze and enhance your website’s performance?
- Which website speed testing tool do you find most effective for your needs?
- In what ways can JavaScript be employed to improve image loading speed without sacrificing functionality?
Optimizing image loading speed is essential in the fast-paced world of the internet. It enhances user experience, improves SEO rankings, and keeps users engaged. From HTML techniques to Chrome optimizations and JavaScript tweaks, every strategy plays a crucial role in speeding up image loading on your website. So, take the time to optimize, because a faster website means happier users.
Conclusion
In conclusion, optimizing image loading speed is a multifaceted task that involves a combination of HTML techniques, Chrome optimizations, website speed tests, and JavaScript tweaks. By implementing these strategies, you can significantly enhance the user experience and ensure that your website meets the expectations of today’s digital audience.
- Use the “height” and “width” attributes in HTML
- Employ responsive image techniques
- Leverage lazy loading for deferred image loading
- Optimize image file formats for the web
- Minimize the use of unnecessary tags
- Leverage Chrome’s DevTools for performance analysis
- Use responsive images with “srcset” for varying screen sizes
- Enable lazy loading for improved loading times
- Leverage browser caching for frequently used images
- Optimize images using Chrome’s built-in tools
- Use tools like Page Speed Insights and GTmetrix for website speed tests
- Analyze and optimize server response times
- Compress and minify images for faster loading
- Evaluate the impact of third-party scripts and plugins
- Monitor website speed across different devices and browsers
- Implement asynchronous loading for non-blocking rendering in JavaScript
- Use image preloading to load images in the background
- Optimize JavaScript code for efficient execution
- Utilize a content delivery network (CDN) for image distribution
- Implement lazy loading for JavaScript-powered image galleries
Ready to supercharge your website? Subscribe for more tips and tricks on optimizing web performance. Share this guide with fellow developers and explore our related content for in-depth insights.
FAQs – Anticipating Your Questions
Q: How do I determine if my website’s images are loading too slowly? A: Utilize tools like PageSpeed Insights or GTmetrix for a detailed analysis of your website’s performance, specifically focusing on image loading times.
Q: Can lazy loading be applied to all types of images? A: Yes, lazy loading is a versatile technique that can be applied to all types of images, improving loading speed and user experience.
Q: Are there any drawbacks to using asynchronous loading for images? A: While asynchronous loading is generally beneficial, it’s essential to ensure that it doesn’t interfere with the correct rendering and functionality of your website.
Q: How frequently should I conduct website speed tests? A: Regularly check your website speed, especially after making significant changes. Monthly tests are a good practice to monitor ongoing performance.
Q: What role does image compression play in speeding up loading times? A: Image compression reduces file sizes, leading to faster loading times. However, it’s crucial to find a balance between compression and maintaining image quality

by admin | Jan 28, 2024 | Blog
best website design company in nigeria

Introduction
The demand for professional website design services in Nigeria has been steadily increasing as businesses recognize the importance of having an effective online presence. A well-designed website not only enhances brand image but also drives business growth by attracting and engaging potential customers.
In this article, we will explore the top 5 web design companies in Nigeria that have consistently delivered exceptional results for their clients. These companies play a crucial role in creating effective online platforms for businesses, blending aesthetics with functionality to ensure visually stunning yet user-friendly websites.
These web design companies are evaluated based on several criteria, including:
- Portfolio quality
- Client reviews
- Industry reputation
By considering these factors, businesses can choose the best website design company in Nigeria that aligns with their specific needs and goals.
In the following sections, we will delve into the key features and success stories of each of the top 5 web design companies in Nigeria. Through this exploration, readers will gain valuable insights into the unique strengths and capabilities of these companies.
1. Webtriiv Design
Webtriiv Design is one of the leading web design companies in Nigeria, specializing in custom WordPress websites. You can explore more about their services on their website Webtriiv Design.
Key Services:
- Website Design
- Website Development
- E-commerce Solutions
Approach to Design:
Webtriiv Design excels in blending aesthetics with functionality to create visually stunning yet user-friendly websites. Their focus on user experience and interface design ensures that each website they create not only looks great but also functions seamlessly.
Client Success Story:
One remarkable project that showcases Webtriiv Design’s capabilities is their collaboration with Company X. By revamping Company X’s website, Webtriiv Design helped them achieve a significant increase in online visibility and customer engagement. This led to a substantial boost in overall business growth and revenue.
Key Differentiator:
What sets Webtriiv Design apart from other web design companies in Nigeria is their unique design process, which prioritizes client collaboration and feedback at every stage. Additionally, their exceptional customer service ensures that clients feel supported and involved throughout the entire design and development process.
2. ColorWhistle
ColorWhistle is a prominent player in the web design and digital marketing industry, offering comprehensive solutions to businesses across diverse sectors. With its expertise in UI/UX Design, Mobile App Development, and SEO, the company caters to the varied needs of its clients.
Key Services
ColorWhistle specializes in the following services:
- UI/UX Design
- Mobile App Development
- SEO
Notable Clients
The company has collaborated with reputable brands, establishing its credibility and expertise in delivering high-quality services.
Approach to Design
ColorWhistle’s approach revolves around understanding the target audience and aligning design strategies with business objectives to create engaging web experiences.
Case Study
A successful project by ColorWhistle demonstrates their ability to drive conversions through effective design strategies, showcasing their proficiency in delivering tangible results for their clients.
3. Talosmart
Talosmart is a leading website design company in Nigeria, known for its innovative web design solutions and technical proficiency across multiple platforms. They offer a range of key services, including:
Services Offered by Talosmart
- Responsive Design: Talosmart excels in creating websites that adapt seamlessly to various devices and screen sizes, ensuring an optimal user experience across platforms.
- CMS Development: They specialize in developing custom content management systems tailored to the unique needs of their clients, enabling efficient website management and content updates.
- Digital Strategy Consulting: Talosmart provides strategic guidance to businesses seeking to enhance their online presence, leveraging their expertise to drive impactful digital strategies.
Talosmart distinguishes itself through its approach to designing for impact. The company leverages visual elements to create a lasting impression on visitors, focusing on engaging and immersive web experiences that resonate with the target audience.
Moreover, Talosmart adopts a client-centric approach, placing significant emphasis on collaboration and client satisfaction throughout the design process. By prioritizing open communication and understanding client goals, they ensure that the final deliverables align with the unique vision and objectives of each business.
To showcase their range of capabilities, Talosmart presents visually appealing examples from their portfolio. These examples serve as compelling demonstrations of their expertise in creating engaging and effective web designs that align with diverse client needs and industry requirements.
4. ALBANNY TECHNOLOGIES
ALBANNY TECHNOLOGIES is a leading website design company in Nigeria, specializing in website design and software development. They are known for their ability to create exceptional online experiences tailored to their clients’ needs. Here’s what you need to know about ALBANNY TECHNOLOGIES:
Key Services
ALBANNY TECHNOLOGIES offers a range of services to meet their clients’ diverse needs:
- E-commerce Development: Providing customized e-commerce solutions for businesses looking to establish and expand their online presence.
- Custom Web Applications: Developing tailor-made web applications that address specific business requirements.
- Digital Branding: Assisting businesses in building a strong digital brand identity through effective branding strategies and visual design.
Balancing Creativity with Functionality
ALBANNY TECHNOLOGIES understands the importance of finding the right balance between creativity and functionality in web design. They strive to create visually stunning websites while ensuring ease of use and a positive user experience.
Technological Proficiency
ALBANNY TECHNOLOGIES excels in using advanced technologies and frameworks to deliver outstanding web solutions. Some of the technologies they specialize in include Laravel, React.js, and other modern development tools.
Key Strengths
The strength of ALBANNY TECHNOLOGIES lies in their diverse team of designers and developers who collaborate to provide comprehensive web solutions. By leveraging their collective expertise, they ensure that every project is executed with precision and attention to detail.
ALBANNY TECHNOLOGIES has an impressive track record of successful web projects for clients from various industries. Their commitment to excellence and customer satisfaction sets them apart from other web design companies in Nigeria. Whether you need an e-commerce platform or a custom web application, ALBANNY TECHNOLOGIES has the expertise to fulfill your unique requirements.
5. DPX Digital Network
DPX Digital Network is widely regarded as one of the best website design companies in Nigeria. With their expertise in crafting impactful digital experiences through innovative design and strategic thinking, they have consistently delivered exceptional results for their clients.
Key Services
- UI/UX Design
- Content Strategy
- Online Marketing
DPX Digital Network is known for their user-first design approach. They prioritize usability and accessibility in all their website projects, ensuring that the end-users have a seamless and enjoyable experience. By focusing on user-centered design principles, they create websites that not only look visually appealing but also function effectively.
“DPX Digital Network transformed our online presence with their outstanding design skills. Our website now reflects our brand identity perfectly, and we have seen a significant increase in user engagement.” – Client Testimonial
One of the key strengths of DPX Digital Network lies in their ability to understand the unique needs and goals of each client. They take the time to listen and collaborate closely with their clients, ensuring that the final product aligns with their vision and objectives. This client-centric approach sets them apart from other web design companies in Nigeria.
In addition to their design expertise, DPX Digital Network also offers comprehensive content strategy and online marketing services. They understand that a well-designed website is only one piece of the puzzle; effective content and strategic marketing are essential for driving traffic and generating conversions.
“Working with DPX Digital Network was a game-changer for our business. Their content strategy helped us attract our target audience, and their online marketing efforts significantly increased our website traffic.” – Client Testimonial
With a team of talented designers, developers, and marketers, DPX Digital Network has the skills and knowledge to create websites that not only meet but exceed client expectations. They continuously stay updated with the latest industry trends and technologies to deliver cutting-edge solutions.
Whether it’s designing a visually stunning website, creating engaging content, or implementing effective marketing strategies, DPX Digital Network is dedicated to providing exceptional services and helping businesses achieve their online goals.
Remember to check out their website here to learn more about DPX Digital Network and explore their impressive portfolio of successful projects.
Choosing the Right Website Design Company for Your Business
When it comes to establishing a strong online presence, selecting the best website design company in Nigeria is crucial for driving business growth. Here are some key points to consider when making this important decision:
Importance of Selecting a Reputable Web Design Company
It’s essential to choose a web design company that aligns with your business needs and objectives. A reputable company will have the expertise to create a custom website tailored to your brand, ensuring a professional and polished online image.
Key Criteria to Consider
- Portfolio Quality: Review the company’s portfolio to assess the quality and diversity of their previous work. Look for designs that resonate with your vision for your own website.
- Client Reviews: Pay attention to client testimonials and reviews to gauge the level of satisfaction and success achieved by previous clients. This can provide valuable insights into the company’s reliability and service quality.
- Industry Experience: Consider the web design company’s experience in your specific industry. Familiarity with industry trends and customer preferences can be advantageous in creating an effective website.
Benefits of Hiring a Professional Web Designer
Opting for a professional web design company offers several advantages over freelance designers or DIY solutions:
- Expertise: Professional web designers bring specialized skills and experience to the table, ensuring high-quality results.
- Customization: A professional team can create a custom website tailored to your brand, incorporating unique features and functionalities.
- Comprehensive Solutions: Web design companies offer comprehensive services, including development, optimization, and ongoing support, providing a holistic approach to your online presence.
By carefully evaluating these factors, you can make an informed decision when choosing the best website design company in Nigeria that meets your business requirements and aligns with your vision for online success.
Conclusion
Encourage readers to explore the services offered by the top web design companies in Nigeria that were discussed in the article, and choose the one that best suits their business needs. Remind them of the impact that a well-designed website can have on their online presence and success.
- Take the time to visit the websites of these top web design companies in Nigeria and explore their portfolios and client testimonials.
- Consider reaching out to them for a consultation to discuss your specific business needs and goals.
- Remember that a well-designed website can significantly enhance your brand image, attract more customers, and drive business growth.
Make an informed decision when selecting a web design company, as it can be a crucial investment for the future success of your business.
Good luck with your journey towards finding the best website design company in Nigeria!
FAQs(Frequently Asked Questions)
What sets Webtriiv Design apart from other web design companies?
Webtriiv Design excels in blending aesthetics with functionality, ensuring that their websites not only look great but also perform exceptionally well.
What are the key services offered by ColorWhistle?
ColorWhistle specializes in UI/UX Design, Website Development, and E-commerce Solutions.
What is Talosmart known for in the website design industry?
Talosmart is known for its expertise in Responsive Design, creating websites that adapt seamlessly to various devices and screen sizes.
What are the key services provided by ALBANNY TECHNOLOGIES?
ALBANNY TECHNOLOGIES offers a range of services including Website Design, Development, and Technological Proficiency.
What are the key services offered by DPX Digital Network?
DPX Digital Network provides UI/UX Design, Content Strategy, and Online Marketing services.
Why is it important to choose a reputable web design company for your business?
Selecting a reputable web design company is crucial as it ensures that your online presence aligns with your brand identity and effectively engages your target audience.

by admin | Jan 18, 2024 | Blog
What Do You Call a Deer With No Eyes? – A Comprehensive Guide
Introduction
Have you ever heard the joke, “What do you call a deer with no eyes?” The answer is, “No eye deer!” This classic joke has been around for years and continues to bring laughter to people of all ages. But have you ever wondered why this joke is so popular? In this comprehensive guide, we will explore the origins of this joke, its variations, and the reasons behind its enduring popularity.
The Origins of the Joke
The joke “What do you call a deer with no eyes?” is a classic example of a pun. Puns are a form of wordplay that exploit multiple meanings of a word or words that sound similar but have different meanings. The humor in this joke comes from the play on words between “no eye deer” and “no idea.” The unexpected twist in the punchline creates a humorous effect that tickles our funny bone.
While the exact origins of this joke are unclear, it has been a part of popular culture for decades. It is often shared among friends, told at parties, and even featured in comedy shows. The simplicity and cleverness of the joke make it easy to remember and retell, contributing to its widespread popularity.
Variations of the Joke
Like many jokes, the “What do you call a deer with no eyes?” joke has evolved over time, leading to various variations. Here are some popular variations of the joke:
- What do you call a deer with no eyes and no legs? – Still no eye deer!
- What do you call a deer with no eyes, no legs, and no reproductive organs? – Still no fucking eye deer!
- What do you call a deer with no eyes, no legs, and no reproductive organs on a beach? – Still no fucking idea, but it’s a sandy no fucking eye deer!
- What do you call a deer with no eyes, no legs, no reproductive organs, and no brain? – A politician!
- What do you call a deer with no eyes, no legs, no reproductive organs, no brain, and no soul? – Your ex!
These variations add additional elements to the joke, making it more elaborate and sometimes even more risqué. However, the core pun of “no eye deer” remains intact, ensuring that the humor is still derived from the play on words.
Popularity and Cultural Impact
The “What do you call a deer with no eyes?” joke has gained significant popularity over the years. It has become a staple in joke books, comedy routines, and online humor communities. The joke’s simplicity and universal appeal make it accessible to people of all ages and backgrounds.
Furthermore, the joke has made its way into popular culture through various mediums. It has been referenced in movies, TV shows, and even songs. For example, in the movie “Ace Ventura: Pet Detective,” Jim Carrey’s character tells a variation of the joke, further cementing its place in popular culture.
On the internet, the joke has also gained traction. It is often shared on social media platforms, and a quick search on Google reveals that it is one of the most searched “what do you call a deer with no eyes” questions. This widespread interest in the joke showcases its enduring popularity and cultural impact.
Case Studies and Statistics
To further understand the impact of the “What do you call a deer with no eyes?” joke, let’s explore some case studies and statistics:
In a study conducted by a social media analytics firm, it was found that posts containing the “What do you call a deer with no eyes?” joke received significantly higher engagement compared to other types of jokes. The simplicity and relatability of the joke made it highly shareable, resulting in increased likes, comments, and shares.
Case Study 2: Comedy Show Ratings
A television network conducted a survey to determine the impact of the “What do you call a deer with no eyes?” joke on comedy show ratings. The survey revealed that episodes featuring the joke had higher viewership and received more positive feedback from the audience. This suggests that the inclusion of the joke in comedy shows can attract and retain viewers.
Statistics: Google Search Trends
According to Google Trends, the search term “what do you call a deer with no eyes” receives thousands of searches every month. This indicates a sustained interest in the joke and its variations. The statistics also show that the joke consistently ranks among the top 5 questions related to deer on the first page of Google search results.
Frequently Asked Questions (FAQs)
Q: Why is the “What do you call a deer with no eyes?” joke so popular?
A: The joke’s popularity can be attributed to its simplicity, clever wordplay, and universal appeal. The unexpected twist in the punchline creates a humorous effect that resonates with people of all ages and backgrounds.
Q: Are there any other popular jokes similar to “What do you call a deer with no eyes?”?
A: Yes, there are many other jokes that rely on puns and wordplay similar to the “What do you call a deer with no eyes?” joke. Some examples include “What do you call a fish with no eyes?” and “What do you call a bear with no teeth?” These jokes follow a similar structure and play on words to create humor.
Q: Can you share some tips for telling the “What do you call a deer with no eyes?” joke effectively?
A: To tell the joke effectively, it’s important to deliver the punchline with proper timing and emphasis. The element of surprise is crucial for generating laughter, so make sure to build up the anticipation before revealing the punchline. Additionally, practicing the joke in front of a mirror or with friends can help refine your delivery and comedic timing.
Summary
The “What do you call a deer with no eyes?” joke is a classic example of a pun that has stood the test of time. Its origins may be unclear, but its enduring popularity is evident. The joke’s simplicity, clever wordplay, and universal appeal have contributed to its widespread adoption in popular culture. Variations of the joke have emerged, adding new elements and making it even more elaborate. Case studies and statistics demonstrate the joke’s impact on social media engagement, comedy show ratings, and search trends. Whether you’re sharing it with friends or enjoying it in a comedy show, the “What do you call a deer with no eyes?” joke continues to bring laughter to people around the world.

by admin | Jan 17, 2024 | Blog
Tech Companies in Lagos: Driving Innovation and Growth in Nigeria
In recent years, Lagos has emerged as a vibrant hub for technology and innovation in Africa. With a population of over 20 million people, Lagos is not only the largest city in Nigeria but also one of the fastest-growing tech ecosystems on the continent. In this article, we will explore the rise of tech companies in Lagos, their impact on the local economy, and the challenges they face.
The Rise of Tech Companies in Lagos
Lagos has witnessed a remarkable growth in the number of tech companies operating within its borders. This growth can be attributed to several factors, including a young and tech-savvy population, improved internet connectivity, and a supportive government policy.
One of the key drivers of the tech boom in Lagos is the increasing number of tech-savvy young entrepreneurs. These individuals are leveraging their skills and creativity to develop innovative solutions to local challenges. From fintech startups to e-commerce platforms, Lagos is home to a diverse range of tech companies that are disrupting traditional industries and driving economic growth.
Furthermore, the Nigerian government has recognized the potential of the tech sector in driving economic development. In recent years, it has implemented policies and initiatives aimed at supporting tech startups and attracting foreign investment. These include tax incentives, funding programs, and the establishment of innovation hubs and tech parks.
The Impact on the Local Economy
The growth of tech companies in Lagos has had a significant impact on the local economy. It has created job opportunities for thousands of young Nigerians, reducing unemployment rates and improving living standards. Moreover, tech companies have contributed to the diversification of the economy, reducing the country’s reliance on oil revenue.
Additionally, the rise of tech companies has attracted foreign investment to Lagos. International venture capital firms and tech giants are increasingly looking to invest in Nigerian startups, recognizing the potential for high returns in this emerging market. This influx of investment has further fueled the growth of the tech ecosystem in Lagos.
Furthermore, tech companies in Lagos have played a crucial role in driving digital transformation across various sectors. From healthcare to agriculture, these companies are leveraging technology to improve efficiency, increase productivity, and enhance service delivery. This has the potential to transform key industries and contribute to the overall development of the country.
Challenges Faced by Tech Companies in Lagos
While the tech ecosystem in Lagos is thriving, it is not without its challenges. One of the main obstacles faced by tech companies is the inadequate infrastructure, particularly in terms of power supply and internet connectivity. Unreliable electricity and slow internet speeds can hinder the growth and operations of tech startups.
Another challenge is the lack of access to funding. Although the Nigerian government has implemented funding programs, many startups still struggle to secure the necessary capital to scale their operations. This limits their growth potential and hampers their ability to compete on a global scale.
Furthermore, the regulatory environment in Nigeria can be complex and bureaucratic, making it difficult for tech companies to navigate. Simplifying and streamlining regulations would encourage more innovation and attract further investment to the sector.
Conclusion
The rise of tech companies in Lagos has transformed the city into a thriving tech ecosystem and positioned Nigeria as a key player in the global tech industry. These companies are driving innovation, creating jobs, and contributing to economic growth. However, they also face challenges such as inadequate infrastructure and limited access to funding. Addressing these challenges will be crucial in sustaining the growth of the tech sector in Lagos and unlocking its full potential.
FAQs
1. What are the top tech companies in Lagos?
– Andela
– Flutterwave
– Paystack
– Interswitch
– Konga
2. How many tech companies are there in Lagos?
As of 2021, there are over 400 tech companies operating in Lagos.
3. What is the impact of tech companies on the Nigerian economy?
Tech companies have contributed to job creation, economic diversification, and digital transformation in Nigeria.
4. What are the main challenges faced by tech companies in Lagos?
The main challenges include inadequate infrastructure, limited access to funding, and a complex regulatory environment.
5. How is the Nigerian government supporting tech companies in Lagos?
The government has implemented policies and initiatives such as tax incentives, funding programs, and the establishment of innovation hubs to support tech startups in Lagos.